I’ve always suspected that there was a disproportionately high percentage of genius among the readers of this blog. This has now been confirmed with the irrefutable finality of Thor’s hammer.
Last year I posted about the discovery of a small Viking amulet on the Danish island of Lolland. The pendant was in a shape known as Thor’s hammer, a well-known design from the Viking Era thought to invoke the power of Thor’s hammer Mjölnir to protect the wearer. Because they’re not a literal hammer shape, however, there has been some debate among scholars about whether these amulets really are representations of Thor’s hammer. The amulet found on Lolland last Spring answered the question with a runic inscription that reads “This is a hammer.”
There are more elaborately decorated Thor’s hammer amulets, like this gold-plated one found in Ödeshög, Sweden, or this one found in Skåne, both now in the Swedish History Museum, but the plainer Lolland hammer is the only one ever found with runes inscribed on it. The fancier ones are as popular today as they were in the 10th century. Pages and pages of search results return links to commercial copies from companies specializing in replicas of historical artifacts to Etsy shops. The Lolland hammer, being a much more recent find, is less extensively duplicated, although at least one outfit wasted no time in creating replicas for sale. It also happens to copy my blog entry word for word and picture for picture.
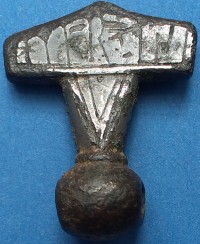
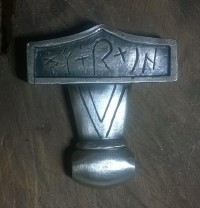
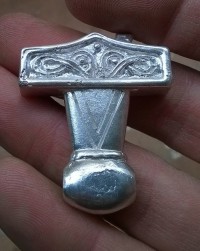
So when regular commenter Lory posted yesterday that he had made his own replica of the Lolland rune hammer, naturally I wanted to see the results of his endeavors. The pictures he sent me so impressed me that I asked if I could post them in a dedicated blog entry. Lorenzo agreed. Here they are on the right next to the original on the left.
The original amulet was cast in bronze and only has traces remaining of silver or tin plating and a tiny smidge of gold plating. Lorenzo, as you see, made his version entirely out of silver.
He agreed to answer a few questions about his work. I first asked if he was a professional jeweler or silversmith or if this was a hobby. The answer astounded me. Not only is he not a professional silversmith, but this was his first attempt at making anything like this. He learned how from YouTube!
I like bricolage like an hobby in my free time. I saw that hammers around the neck of many people during a summer trip in Denmark riding my old motorcycle. They said me that that hammer (mjölner, in danish language) is like an amulet in that place.
And so, when I came back to home in Italy, I’ve decided to buy a mjölner for my neck too, but looking on the net, I saw the Lolland one in Copenaghen Museum and I loved it. I strongly wanted it and so, I decided to make my silver copy.
I’ve learned the mergering system from the net (Youtube is a good teacher). I bought special wax (more hard than normal) for the maquette, and some instruments to model it like the original one.
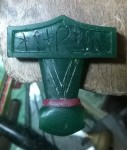
The size isn’t the same, because I don’t know the real one, and there are some little differences too, because I’m not a professional jeweller. The silver comes from some little tea spoons that I’ve stolen [from] my mother.
Is that not the greatest thing ever? I think we can all agree that his mother’s tea spoons gave their lives for a noble cause.
After the wax model, I’ve made a negative copy of it in a big cuttlefish bone bought in a special shop. If you look on the net, you’ll see that the mergering method is very simple and fast.
I did look on the web and Lorenzo knows whereof he speaks. Cuttlebone is apparently an ideal material for home silver casting because it can withstand great heat and can be carved easily into a detailed mold. From the Wikipedia entry on cuttlebone:
Jewelers prepare cuttlebone for use as a mold by cutting it in half and rubbing the two sides together until they fit flush against one another. Then the casting can be done by carving a design into the cuttlebone, adding the necessary sprue, melting the metal in a separate pouring crucible, and pouring the molten metal into the mold through the sprue. Finally, the sprue is sawed off and the finished piece is polished.
Which is just what Lorenzo did.
After the mergering, with a soldering butane blowpipe and a ceramic melting pot, I’ve used three different paste and a little circular instruments with my little drill to eliminate some mergering imperfections and make it shining like you can see in the last two pics.
That’s all. 🙂
Here’s the finished pendant, bright and shiny as the original would have been before the plating wore off:
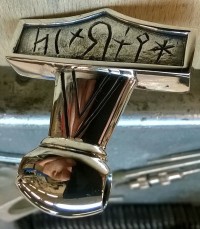
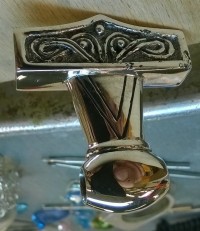
Can you believe that’s his first attempt at casting silver? It’s downright inspiring. (Don’t worry, Mom, your silver collection is safe from me.)
For the necklace Lorenzo plans “a strong leather cord with beautiful old style clasps.” I’m sure it will look smashing.
